
Introduction
Quick Filters allow viewers of a Timepiece report to easily fine-tune the report’s source data, based on preconfigured filter options.
While configuring a Timepiece report, you can define which Jira system/custom fields will be used as Quick Filters, configure the available options for each field, and optionally define default values. Viewers can then apply these Quick Filters to fine-tune report results without having to modify the overall report configuration.
Quick Filters are available on both the main reporting page and in Timepiece dashboard gadgets. Since it is also possible to configure gadgets with param sets, you can configure quick filters on the main reporting page, save the report configuration as a Parameter Set, and set up a gadget using the saved parameter set.
The Quick Filters feature is particularly powerful for dashboard gadgets, as it allows dashboard viewers to alter a gadget's configuration without editing the dashboard or the gadget.
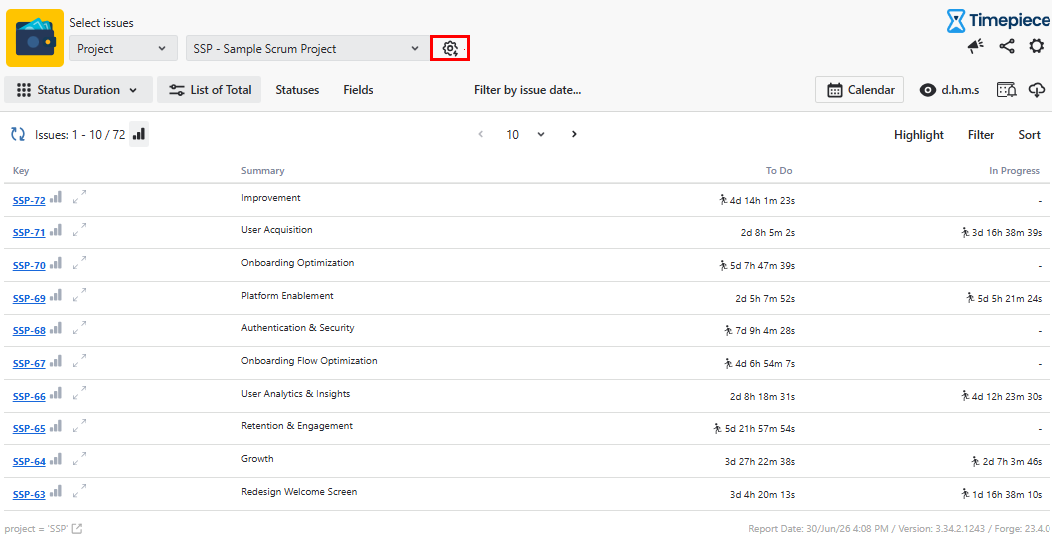
Using Quick Filters
Click the Quick Filters button on the main reporting page to view the fields configured for filtering. Each field will have some configured options to select from. When you click Apply, the selected values will be added to the JQL query that gathers the source report data.
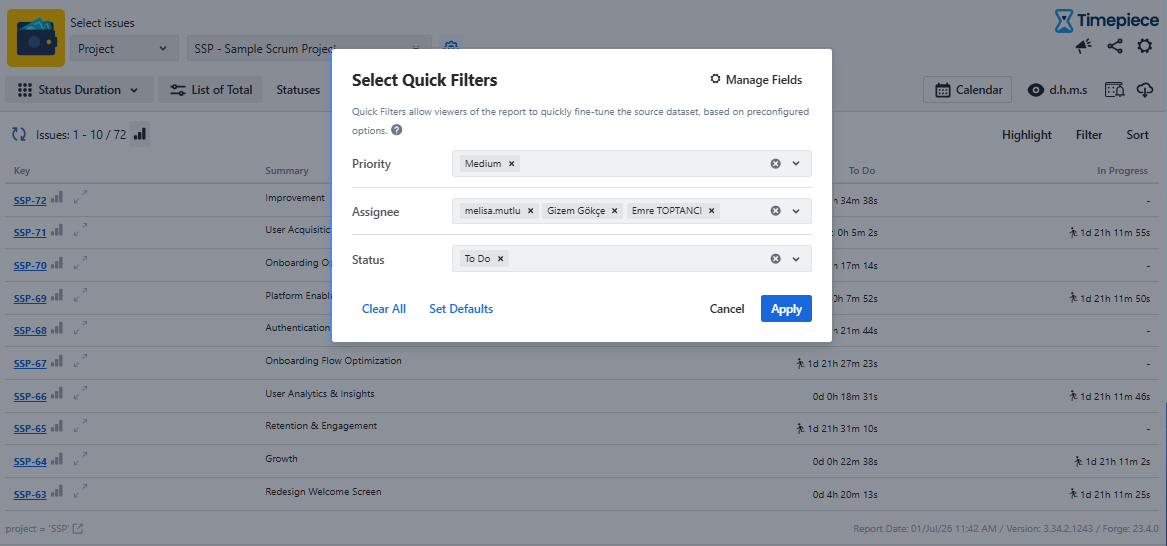
Configuring Quick Filters
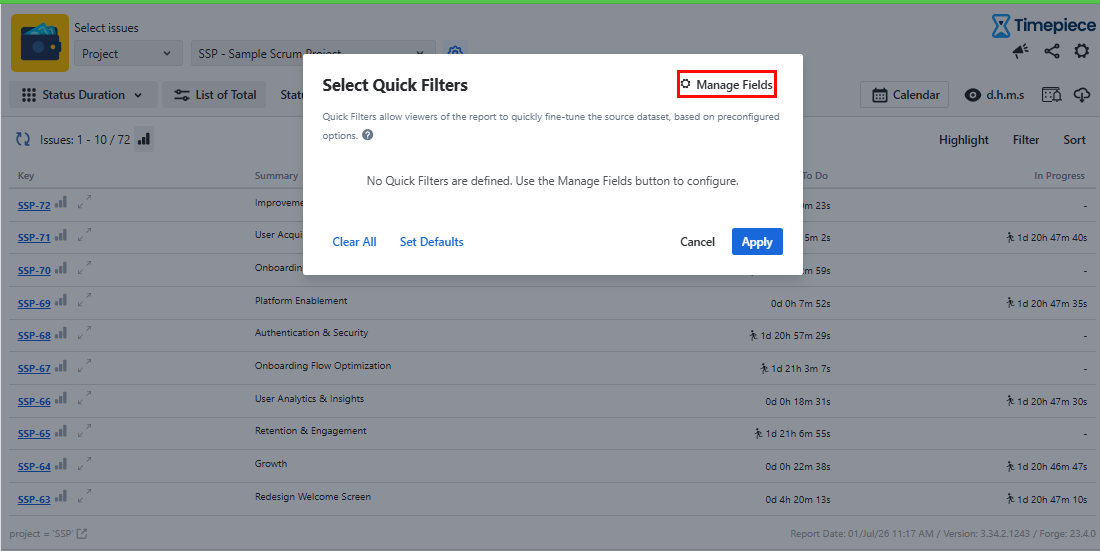
Use the Manage Fields button on the Select Quick Filters dialog to open the Manage Quick Filters dialog.
From the management dialog, you can select the fields to appear in the Quick Filters menu and set their configuration details.
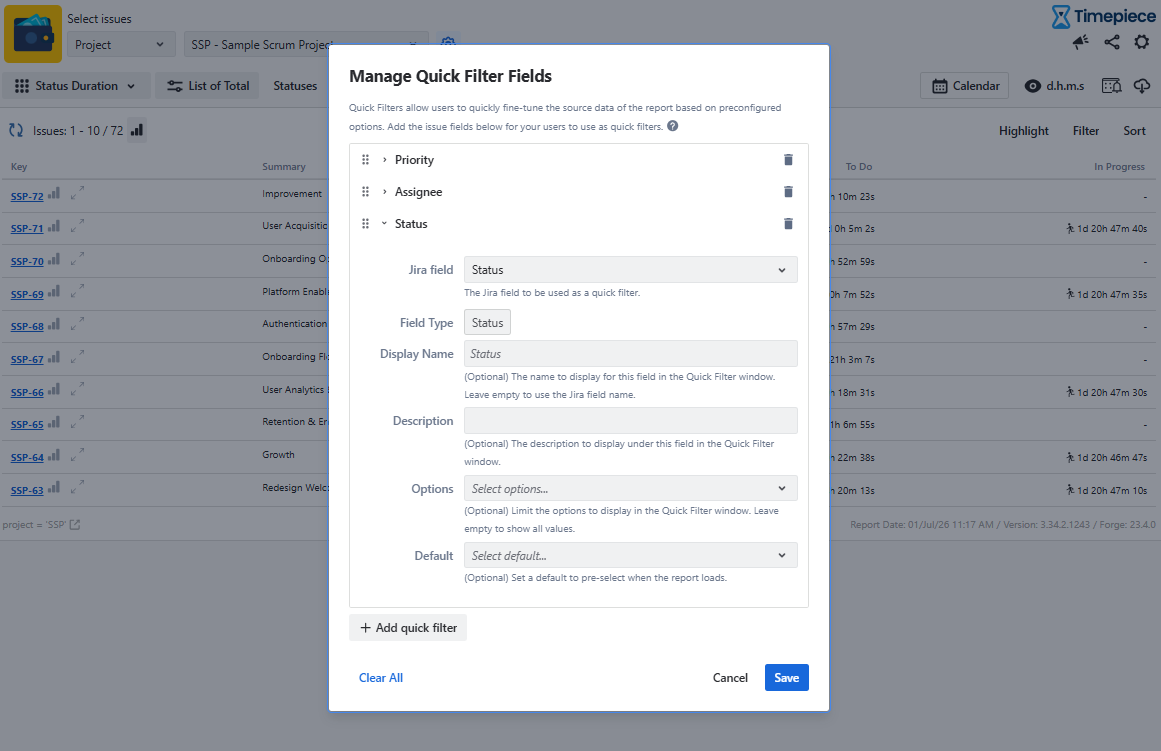
For every quick filter you add, you can configure:
-
Field – The Jira (system or custom) field that will be used for that particular quick filter selection. Almost all system or custom field types are supported.
-
Display Name – Optionally provide a custom display name for this quick filter. The name defined here will be displayed in the Select Quick Filter dialog. If no name is defined, the Jira field name will be used.
-
Options – Choose which field options should be available to the user for this quick filter. If you don’t set any options, Timepiece will try to display all the options available in the field. If you set some options, only those options will be displayed.
-
Description – Optionally add a description to help users understand the purpose of the quick filter. The description entered here will be displayed below the picker control on the Select Quick Filter dialog.
-
Default Value – Optionally pick one or more values that should be selected by default.
You can add the same Jira field multiple times with a different name and different options. This is by design and aims to provide flexibility.
After saving the configuration, the configured quick filters immediately appear in the Select Quick Filters dialog on the reporting page.
How to Apply Quick Filters in Jira Gadgets?
Quick Filters are also supported in Jira gadgets. For details about using Quick Filters in Jira Gadgets, please see the Gadget page.
Related use case articles: