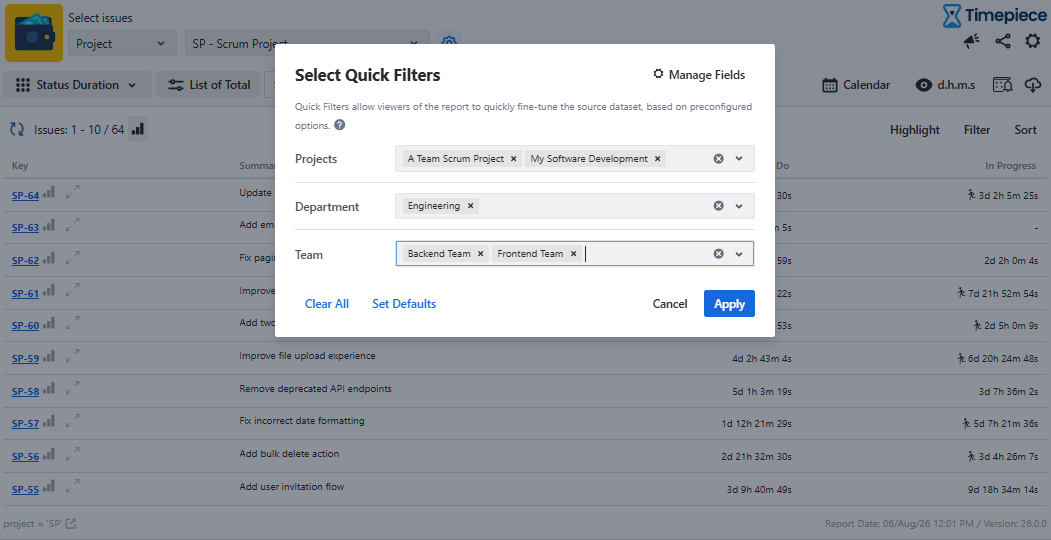
This article describes how to use Quick Filters so that one Timepiece - Time in Status report can be re-targeted to different teams, departments, or projects, instead of maintaining a separate report configuration for each of them. It covers three tasks: defining Quick Filter fields on the reporting page, saving the report together with its filters as a Parameter Set so it can be shared or reused, and applying quick filter values to change the source data of the report. Quick filter selections are added as extra clauses to the JQL query that retrieves the report data, so the report configuration itself does not change.
Business Need
You have configured a Timepiece - Time in Status report and want to make it available to users in your organization. Other teams, departments, and projects need the same analysis applied to their own work items, and configuring a separate report for each of them is not practical. What you need is one report that users can adapt themselves.
Challenges
-
Each team, department, or project that needs the report requires another report configuration to be set up.
-
When several report configurations exist in parallel, any change has to be repeated in all of them.
-
If users are given a list of report names or links, it is not obvious to them which one applies to their team, department, or project.
Solution
Quick Filters are predefined source-data-filter options that users can apply while viewing a report. With Quick Filters, one report configuration is enough: the fields you expose let each user restrict the report to the work items they are interested in, so no separate configuration per team, department, or project is needed.
Quick Filters are defined on the main reporting page. Saving the result as a Parameter Set keeps the report and its filters together, so the same configuration can be given to other users or selected later when a dashboard gadget is configured.
Step 1: Define the Quick Filter Fields
-
Go to the Timepiece reporting page and set up the report you need.
-
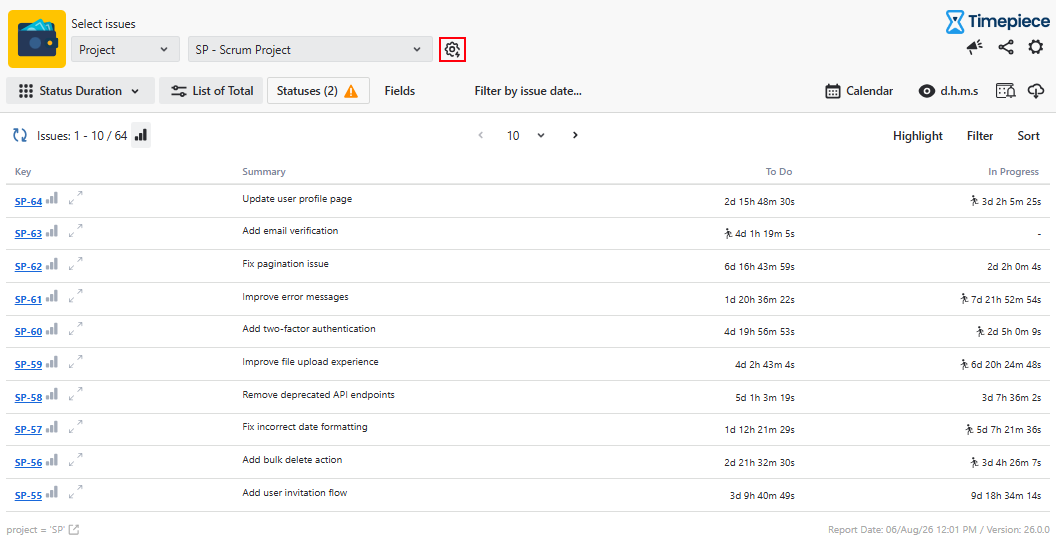
Open the Quick Filters button.
-
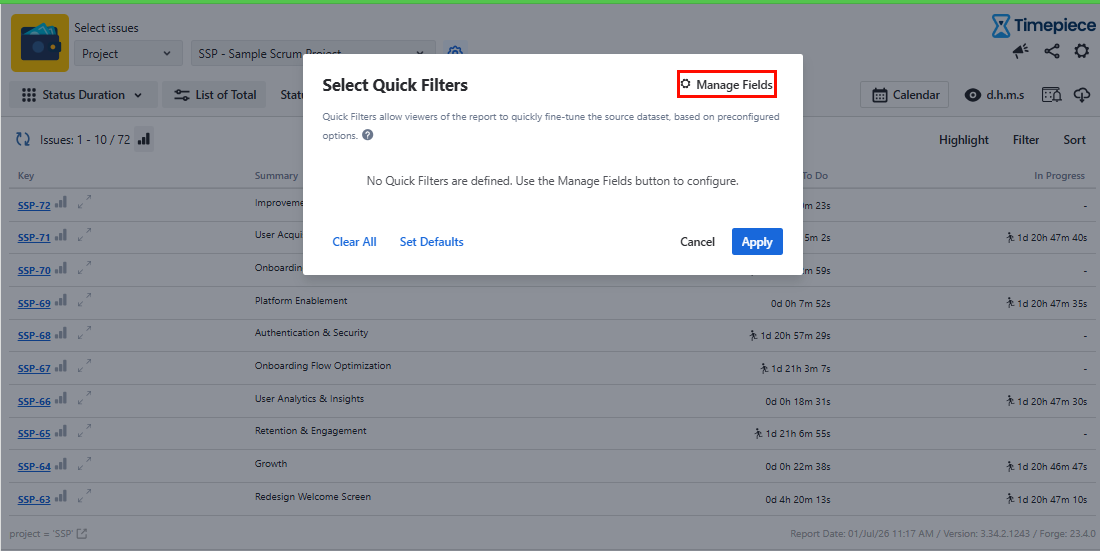
The dialog lists the quick filters that the report already has. On a new report, the list is empty.
-
Choose Manage Fields to define them.
-
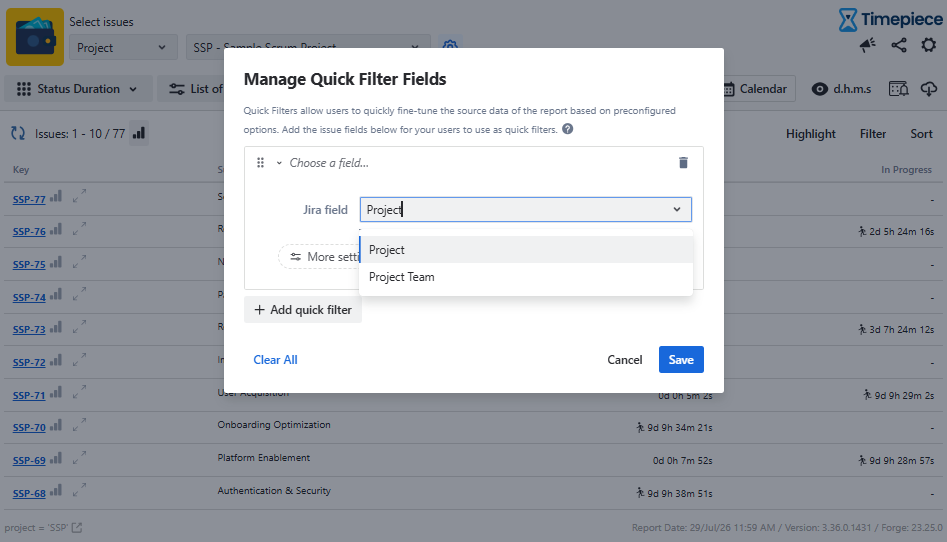
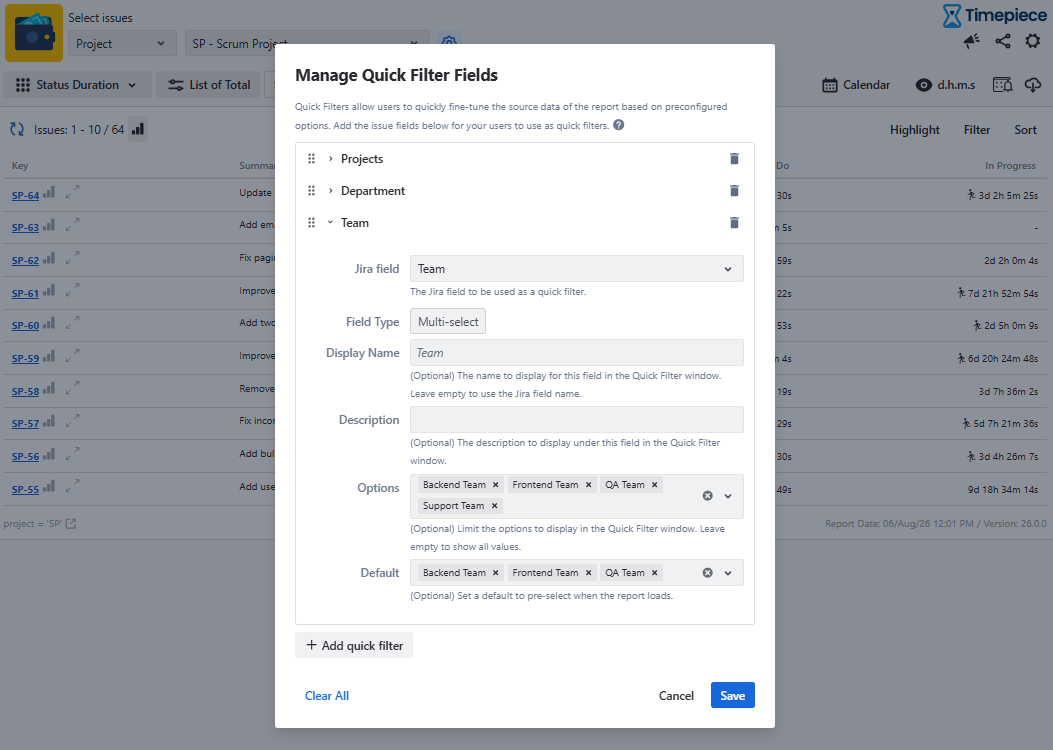
Select the Jira fields that users should be able to filter on. Project, Team, and Department are common choices, but any system or custom field can be used.
-
Each field has advanced settings. Use them to rename the field, add a description, restrict the values that are offered, or set a default value.
-
Save the field list.
-
The fields you defined are now listed in the Select Quick Filters panel of the report.
Step 2: Store the Report Configuration as a Parameter Set
-
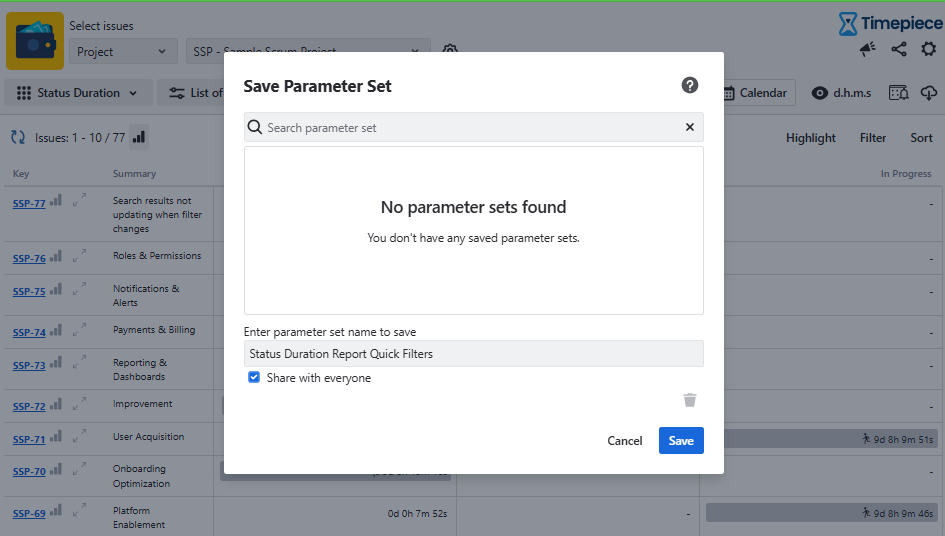
Store the report as a Parameter Set so that the report settings and the quick filters do not have to be set up again.
-
If other users are meant to work with the report, switch on the “Share with everyone” option while saving.
-
A Parameter Set holds the quick filter definitions together with the report settings, so anyone who loads it gets the same filtering options.
Step 3: Re-target the Report with Quick Filters
-
On the report, you and the users the parameter set is shared with can open the Select Quick Filters panel and select values in the fields you defined.
-
Every selected value adds a clause to the JQL query that retrieves the source data, which changes the output of the report.
-
One report can therefore be used for different work item sets while its configuration stays unchanged.