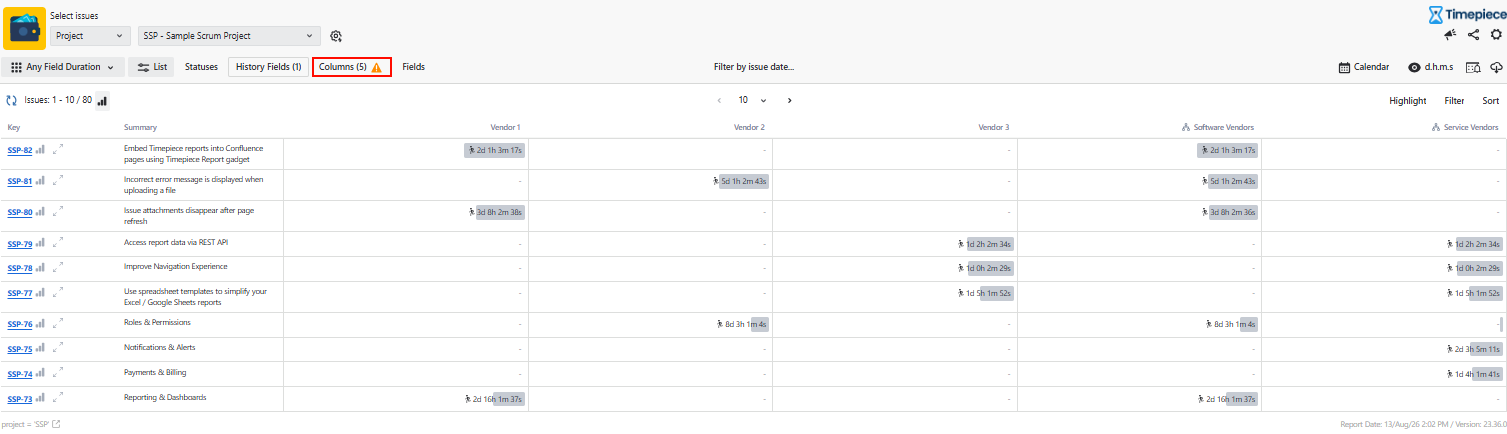
This article describes how to measure how long Jira issues wait on each external vendor without creating a separate status per vendor, using a Vendor custom field captured on the transition into a Waiting for Vendor status and reported with the ANY FIELD DURATION report of Timepiece - Time in Status. It covers the workflow setup — custom field, status, transition screen, and a post function that clears the field on exit — as well as the reporting. It also explains how to use Consolidated Columns to group multiple vendor durations and measure their combined waiting time as a single value.The result is per-vendor waiting time that can be used in supplier performance reviews and SLA discussions, while the workflow stays simple.
Business Need
Let's presume ...
Each of your Jira issues represent a customer request that needs to be completed. Sometimes you need to escalate the request to external vendors.
You want to see how much time you spent waiting for vendors, without adding statuses for each vendor. You may also want to measure the total waiting time across multiple vendors as a single value.
Solution
ANY FIELD DURATION report of Timepiece can be utilized for this purpose.
You should...
-
Customize your workflow
-
Create a Jira custom field named Vendor and define all your vendors as options for this field.
-
Customize your Request workflow
-
Create a status named Waiting for Vendor and add this status to your workflow.
-
Define a screen for the transition to Waiting for Vendor status, put the Vendor field on this screen and make it mandatory.
-
Clear the value of Vendor field with a Post Function while after transitions out of Waiting for Vendor status.
-
-
-
Open Timepiece reporting page.
-
Select the project in which your requests reside (or set any other filter to get the issues to report on).
-
Switch to ANY FIELD DURATION report.
-
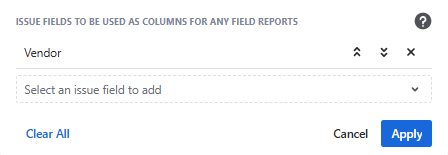
Click the History fields button
-
Clear any already selected fields if there are any.
-
Select Vendor field as a History Field.
-
Click Apply.
-
-
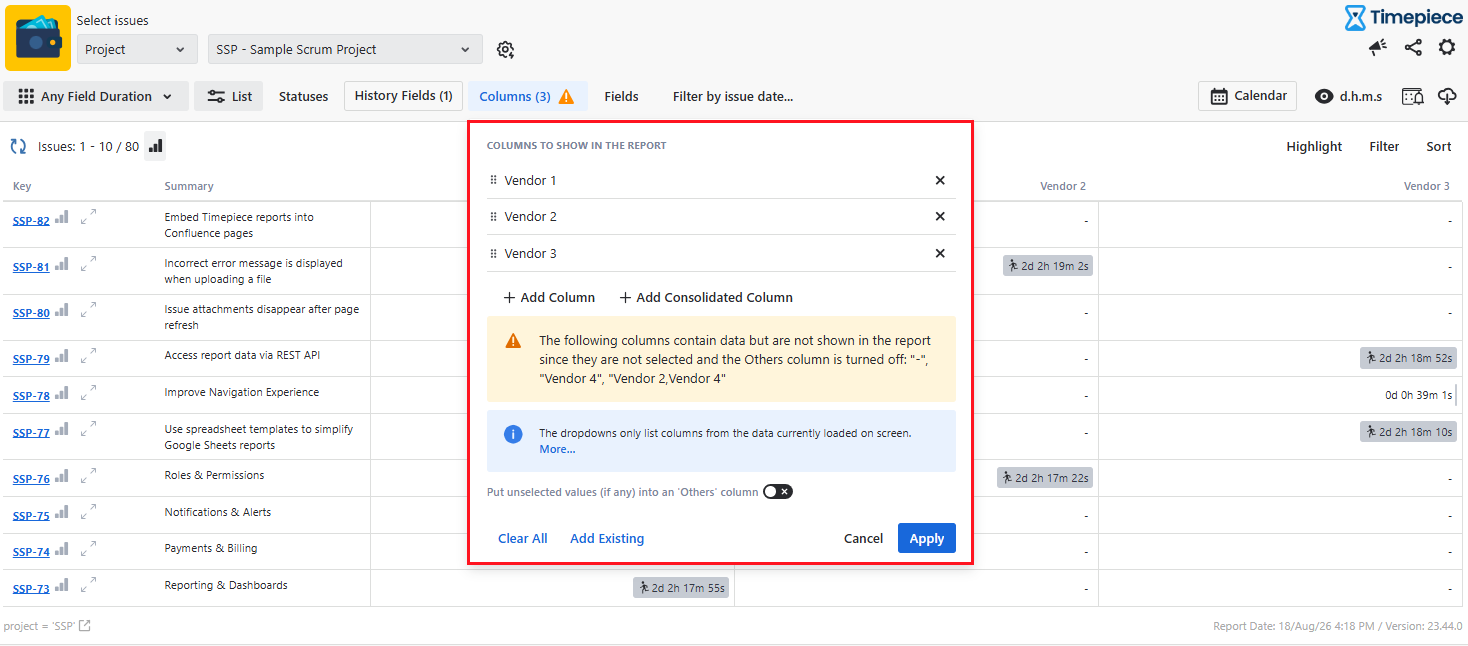
Click the Columns button
-
Select the vendor values you want to include as columns. (You can leave this selection empty. If no vendor values are selected, all available vendor values are listed in the Columns section by default.)
-
Click Apply.
-
-
Select your business calendar if you defined one.
-
Select the appropriate start and end dates.
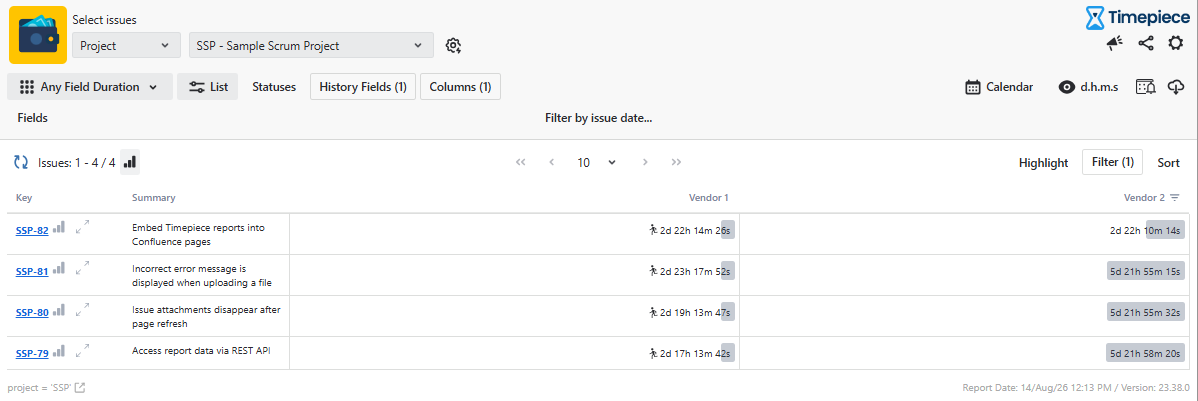
The report will show how much time each of your issues spent waiting for each vendor.
You can of course also use average or sum reports on this data.
Grouping Vendor Durations
You can also use Consolidated Columns to group multiple vendor columns and view their combined duration as a single value. This can be useful when you want to analyze the total waiting time across a group of vendors rather than reviewing each vendor separately.
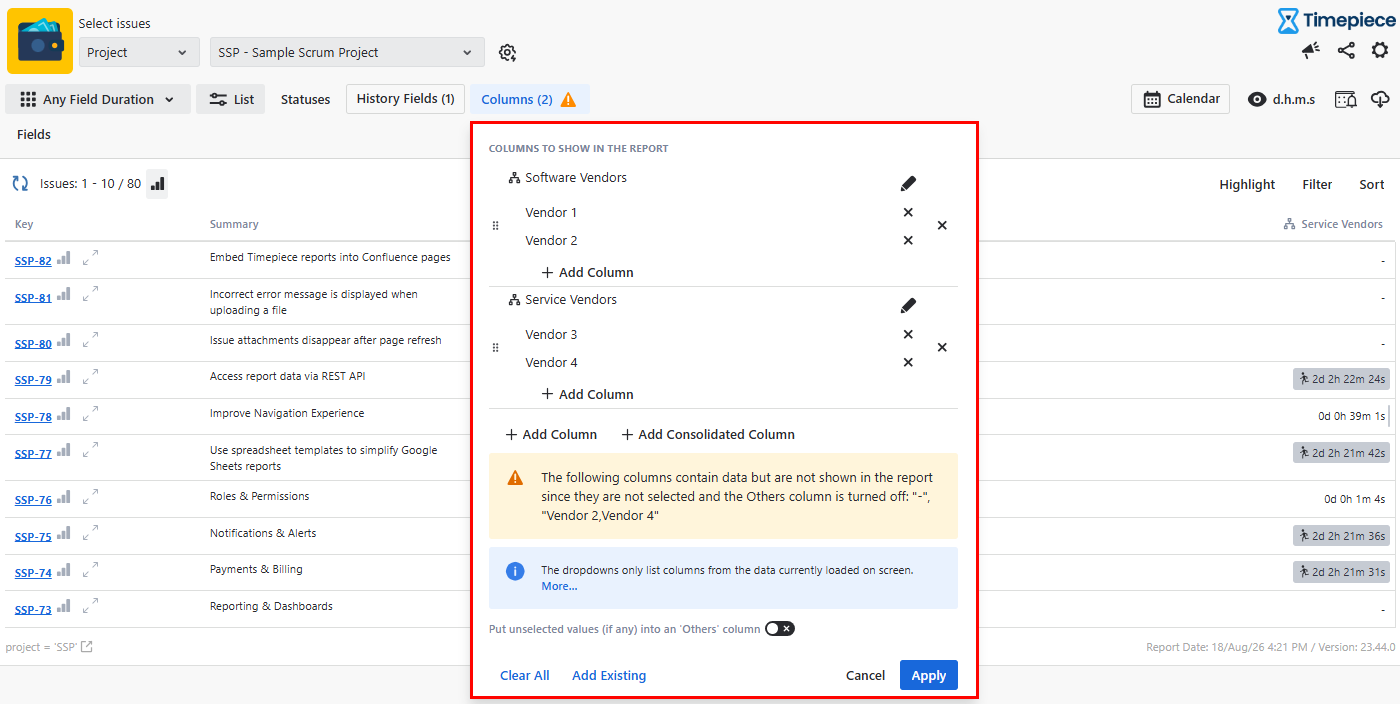
-
Open the History Field panel
-
Select Vendor as the History Field.
-
Open the Columns panel.
-
Click Add Consolidated Column.
-
Select the vendor columns to be grouped.
-
Enter a name for the consolidated column.
-
Click Apply.
The consolidated column will display the combined duration of the selected vendors as a single value.