
This article explains how to use a Timepiece - Time in Status SLA Report with Jira Automation to identify work items where the first response exceeds the defined SLA target and automatically add a comment when the SLA is breached. The SLA metric measures the First Response Time from Issue Creation to In Progress, with a target of 4 hours. If the work item does not reach In Progress within 4 hours of creation, the First Response Time SLA is considered breached and Jira Automation posts a comment on the work item.
Business Need
You need an automated process that monitors the First Response Time of work items and identifies SLA breaches without requiring the SLA Report to be checked manually.
When a work item does not reach In Progress within the defined SLA target, the team should be notified directly on the work item so the delayed response can be addressed promptly.
Solution
The SLA report type of Timepiece, combined with Jira Automation, can be used for this purpose.
Step 1: Configure and Save the Timepiece SLA Report
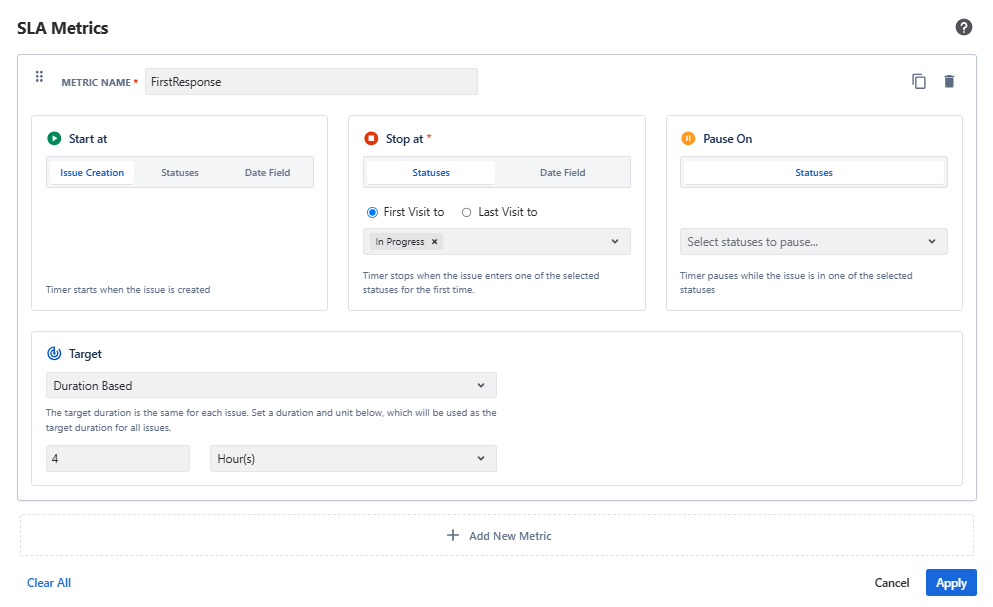
First, create an SLA Report that measures the First Response Time from Issue Creation to In Progress and uses a Duration Based target of 4 hours.
-
Open the Timepiece reporting page.
-
Select the project in which the work items reside.
-
Switch to the SLA report type.
-
Open the Metrics panel and add a new SLA metric.
-
Set Start At to Issue Creation.
-
Set Stop At to In Progress.
-
Set the SLA target type to Duration Based.
-
Set the target to 4 hours.
-
Save the SLA metric configuration.
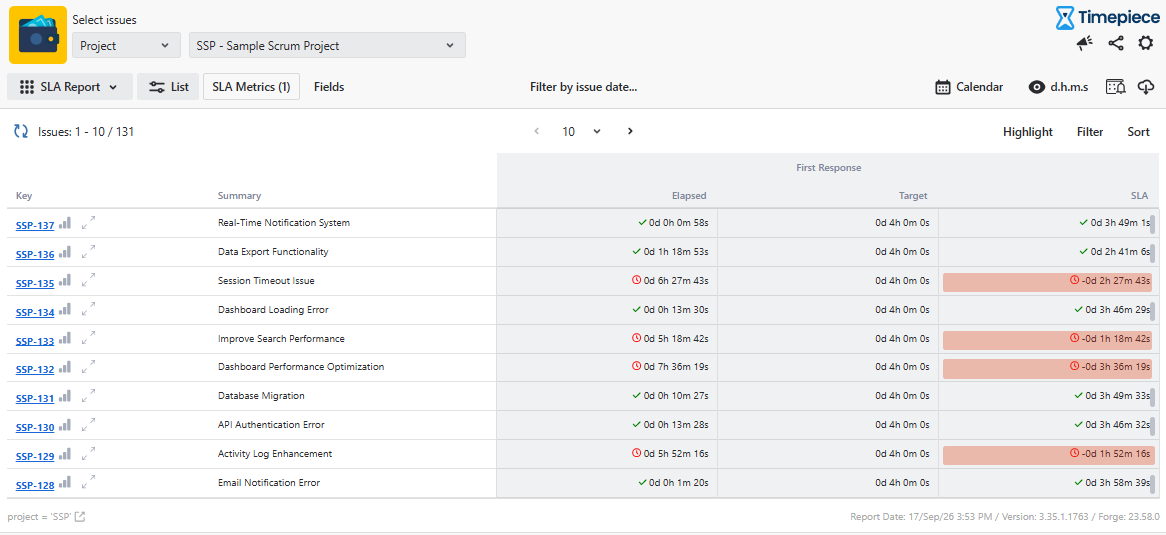
The resulting SLA metric evaluates whether the work item reaches In Progress within the defined 4-hour target from Issue Creation. If the work item does not reach In Progress within 4 hours, the SLA status becomes breached.
-
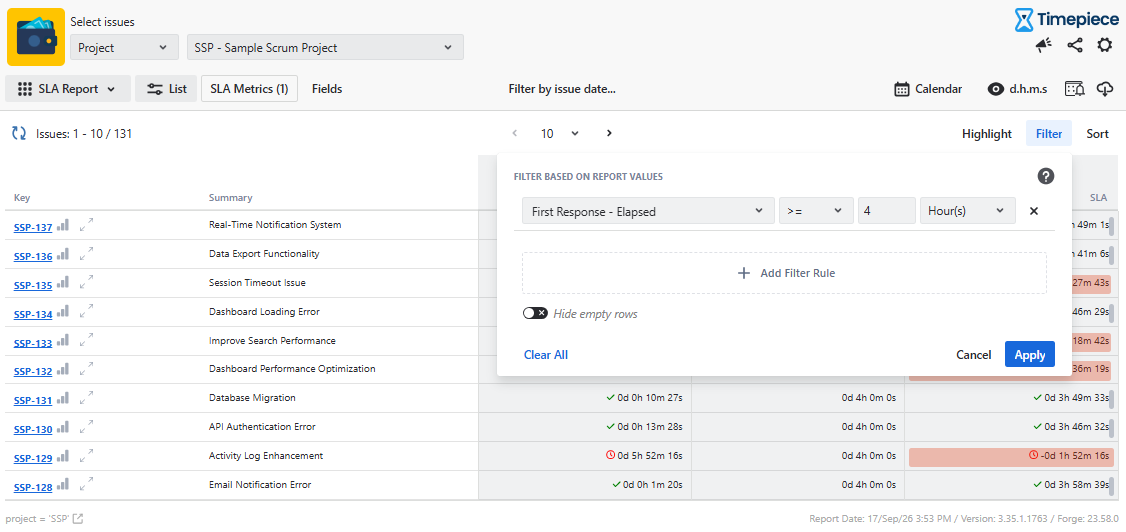
In the report filters, set Elapsed Time to greater than 4 hours so that the report includes only work items that have exceeded the 4-hour SLA limit.
-
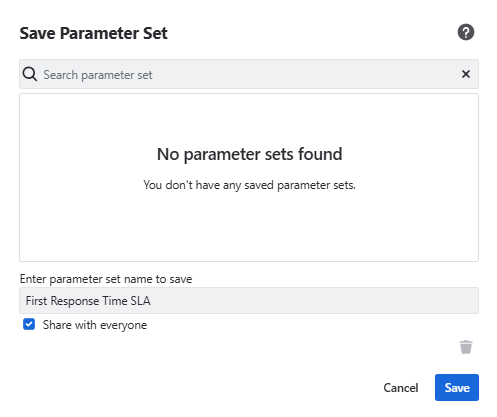
Go to Settings and save the report using Save Report Parameters.
-
Use a descriptive parameter set name, such as "First Response Time SLA".
-
Select Share with everyone so the parameter set can be used by the automation.
Step 2: Create a Jira Automation Rule
Navigate to Jira Automation and create a new rule.
Before configuring the automation logic, define the administrative settings in the Flow Details section.
Step 3: Define the Trigger
Use the Scheduled trigger to run the automation periodically.
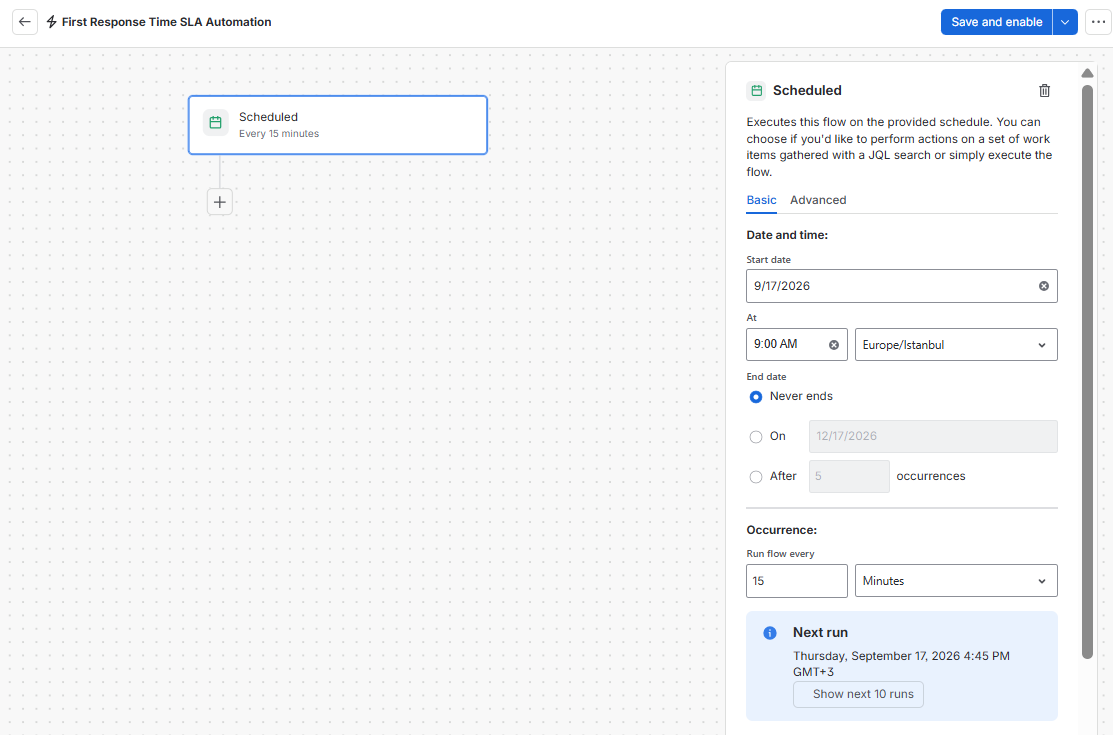
Configure the trigger to run every 15 minutes. This allows the automation to regularly check work items against the defined 4-hour SLA target and identify work items whose First Response Time has exceeded the target.
Step 4: Add Action - Timepiece: Run Report
Add a Timepiece: Run Report action to retrieve the SLA results from the saved Timepiece report.
-
Select the First Response Time SLA parameter set in the Report Settings field.
-
Make sure the report has been saved using Save Report Parameters.
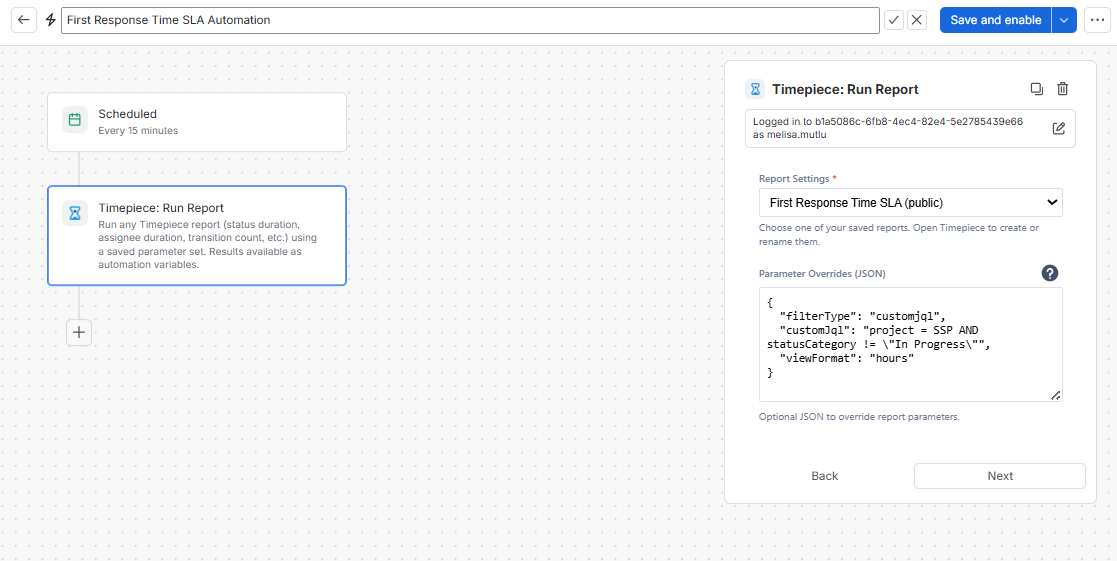
Parameter Overrides
Use Parameter Overrides to limit the report to the work items that should be evaluated by the automation.
Parameter Overrides: { "filterType": "customjql", "customJql": "project = SSP AND statusCategory != \"In Progress\"", "viewFormat": "hours" }
Step 5: Add Log Action (Optional)
Add a Log Action to inspect the data returned by Timepiece.
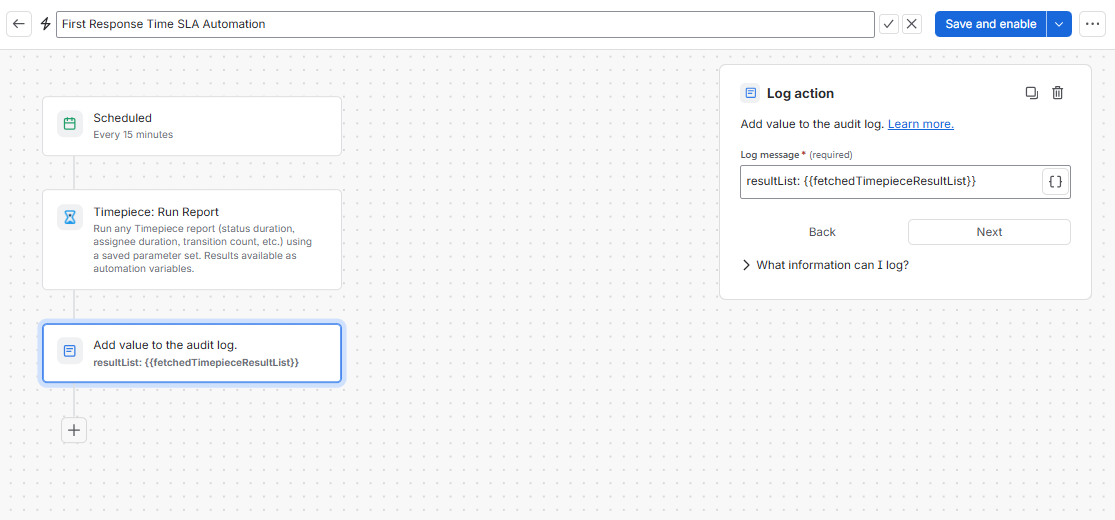
Log Message:
resultList: {{fetchedTimepieceResultList}}
This is useful for verifying the SLA result returned by the report and for troubleshooting the automation if needed.
Note: For more details about logging and debugging, see the documentation.
Step 6: Create a Lookup Table
Create a dynamic lookup table to associate each work item with its SLA result returned by Timepiece.
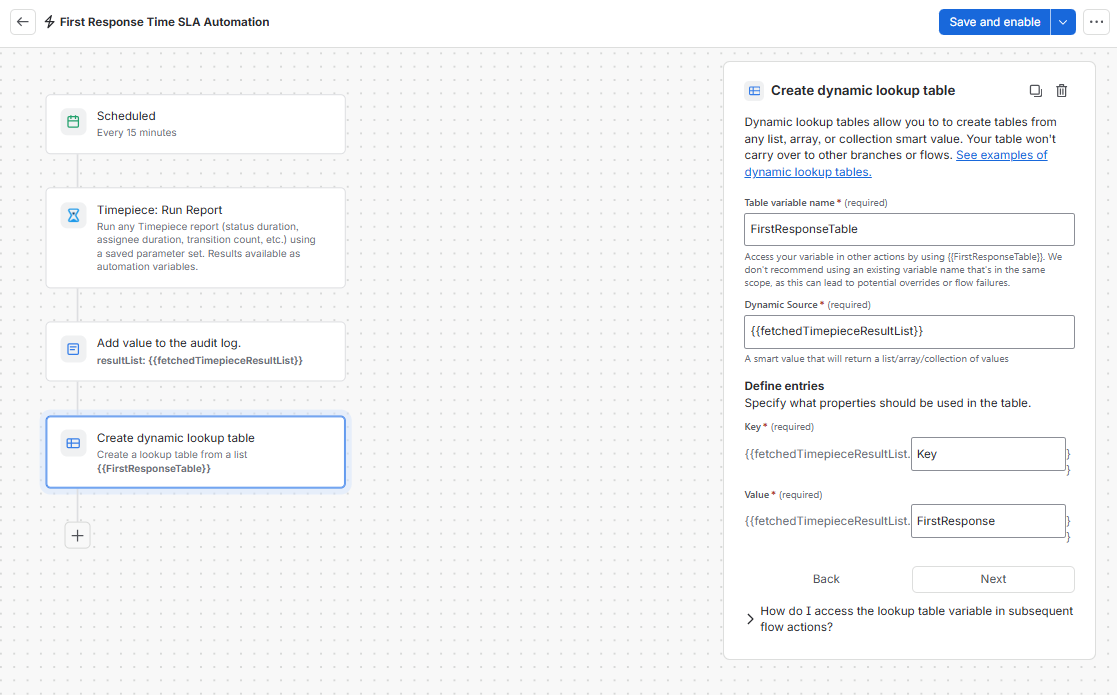
Table variable name: FirstResponseTable
Dynamic Source:{{fetchedTimepieceResultList}}
This allows the automation to retrieve the SLA result for each work item while processing the report results.
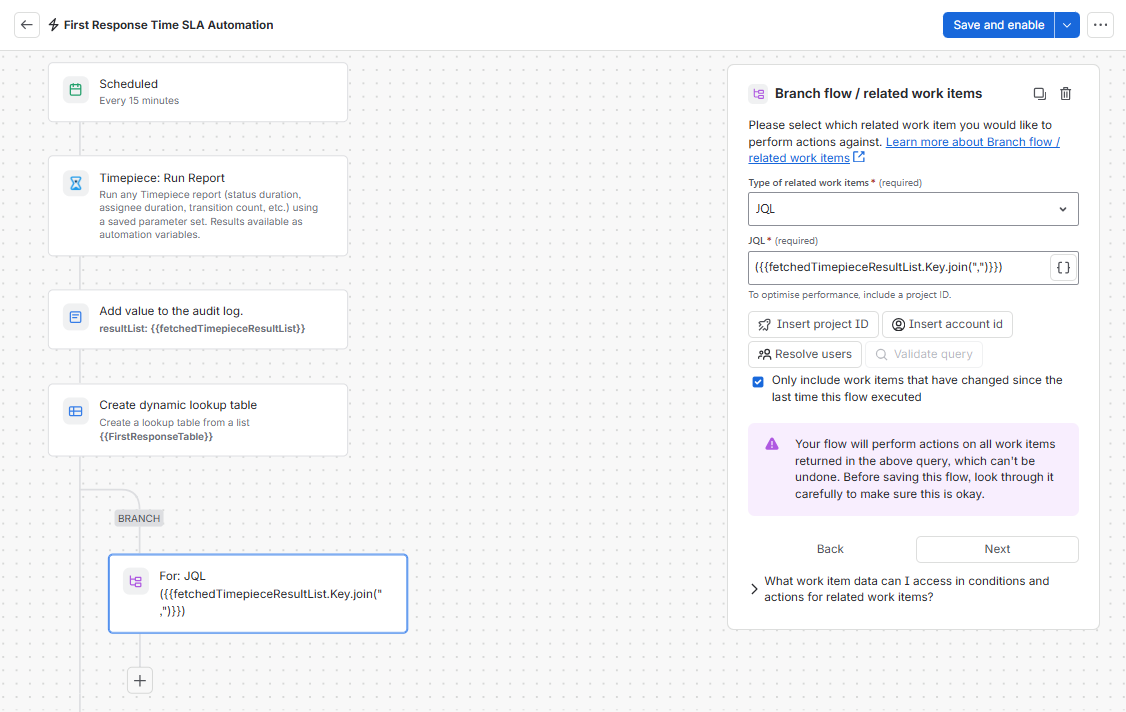
Step 7: Add Action - Branch / For: JQL Loop
Add a Branch block and select For: JQL to iterate through the work items returned by the Timepiece report.
({{fetchedTimepieceResultList.Key.join(",")}})
Use the keys returned by the Timepiece report to process each work item individually.
Step 8: Add Comment To Work Item
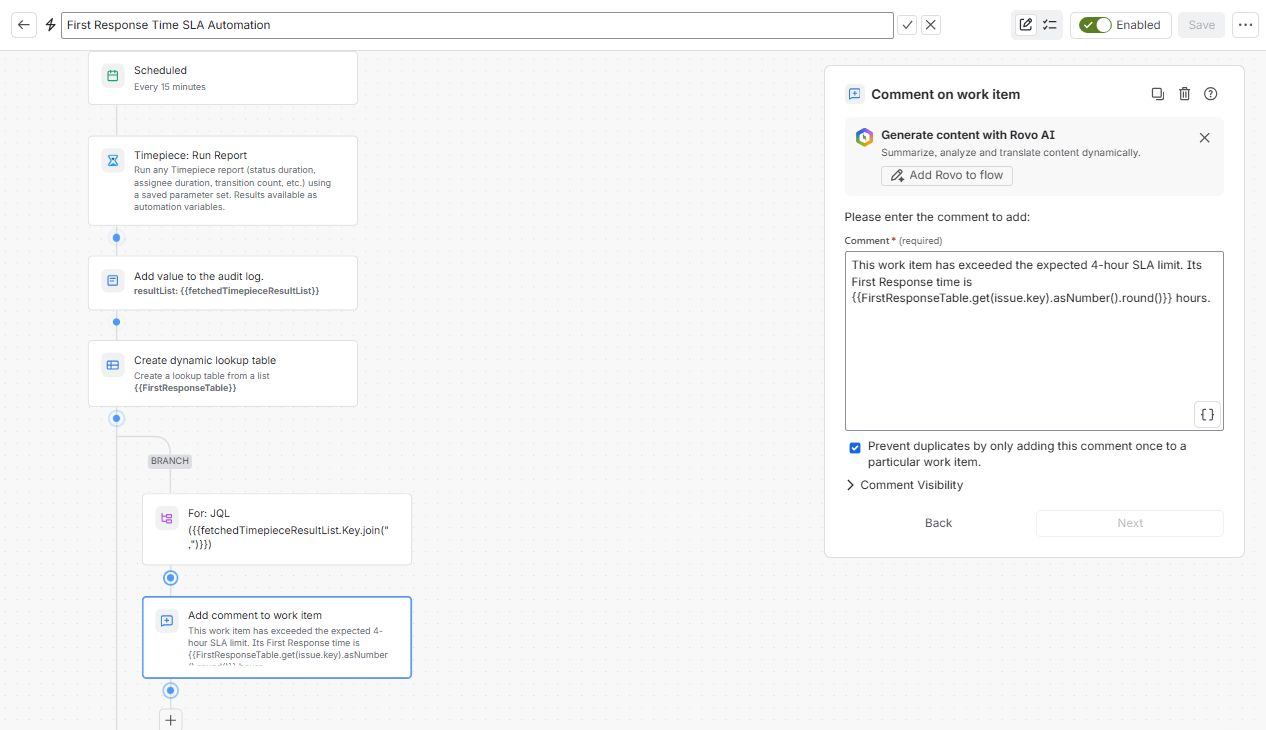
Add a Comment on work item action inside the breached branch.
Use a comment such as:
This work item has exceeded the expected 4-hour SLA limit. Its First Response time is {{FirstResponseTable.get(issue.key).asNumber().round()}} hours.
This adds the calculated First Response time to the work item when the 4-hour SLA limit has been exceeded.
Step 9: Enable the Rule
Click the Turn on rule button to activate the automation.
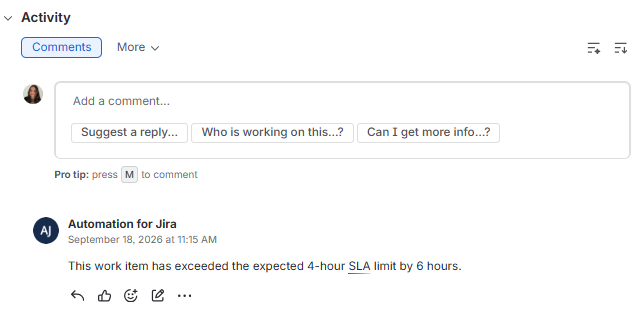
Once active, the rule periodically runs the saved Timepiece SLA Report, checks the SLA status of the relevant work items, and automatically adds a comment to work items whose First Response Time has exceeded the defined 4-hour SLA target.
For more information about configuring SLA Metrics and targets, see SLA Metrics.