
This article explains how to use custom date fields to set SLA targets in Timepiece - Time in Status for Jira. It uses a customer request lifecycle to demonstrate how multiple SLA metrics can track different stages of a request, with each stage using its own negotiated deadline.
Use Case
The company wants to track whether customer requests are completed within their assigned deadlines. The deadlines are set separately and can be different for each work item; a fixed duration does not meet the requirement.
Challenge
The SLA target needs to come from a date field defined on the work item. This allows the company to set a specific deadline for each request and compare the actual elapsed time against that deadline.
Solution
Timepiece SLA Reports support Date Field Based targets. A custom date field can be selected as the target for an SLA metric.
In this example, the workflow uses custom statuses such as To Do, Approved, In Progress, Completed, and Delivered. The SLA targets use custom date fields, such as Evaluation Due Date, Implementation Due Date, and Delivery Due Date.
Step 1: Create an SLA Metric
First, create an SLA metric that measures the period from the start of the work until it is delivered.
-
Open the Timepiece reporting page.
-
Select the project in which the work items reside.
-
Switch to the SLA report type.
-
Open the Metrics panel and add a new SLA metric.
-
First, create an SLA metric to measure the time from when the work item enters the To Do status until it enters the Approved status.
-
Start At: To Do
-
Stop At: Approved
-
Target: Evaluation Due Date
The SLA metric measures the elapsed time between the To Do and Approved statuses and uses the Evaluation Due Date custom field as its target.
-
-
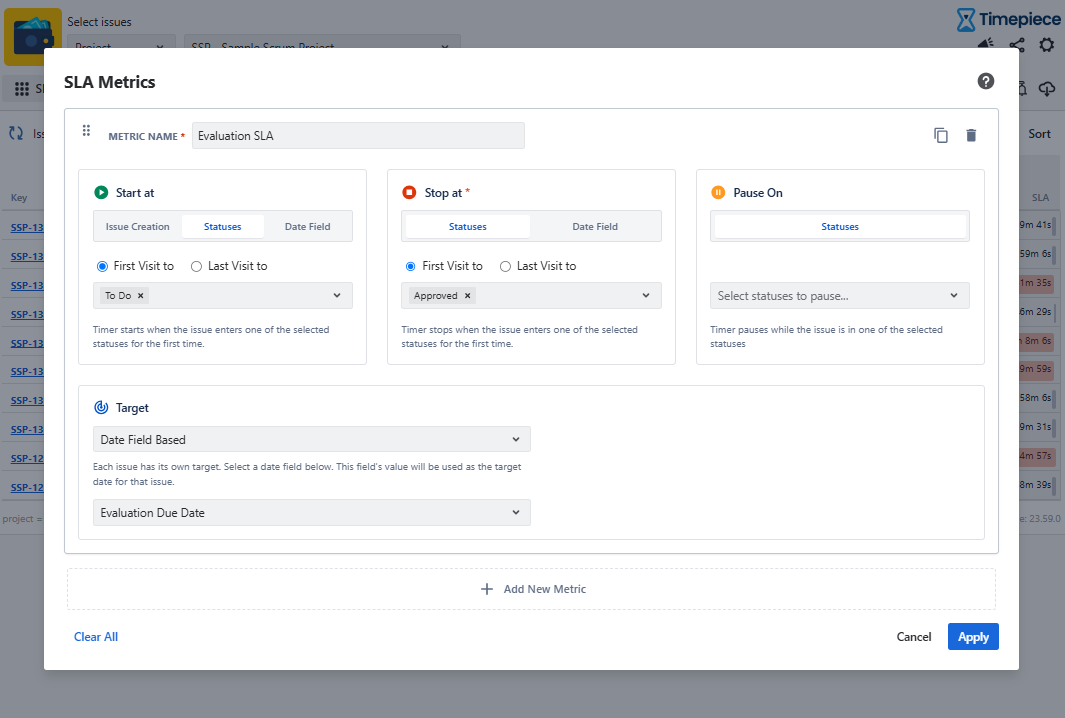
You can create multiple SLA metrics for different stages of the workflow, with up to 10 SLA metrics in a single SLA Report.
In this use case, three SLA metrics are defined:
-
Evaluation SLA: Measures the time from To Do to Approved and uses Evaluation Due Date as the target.
-
Implementation SLA: Measures the time from In Progress to Completed and uses Implementation Due Date as the target.
-
Delivery SLA: Measures the time from Completed to Delivered and uses Delivery Due Date as the target.
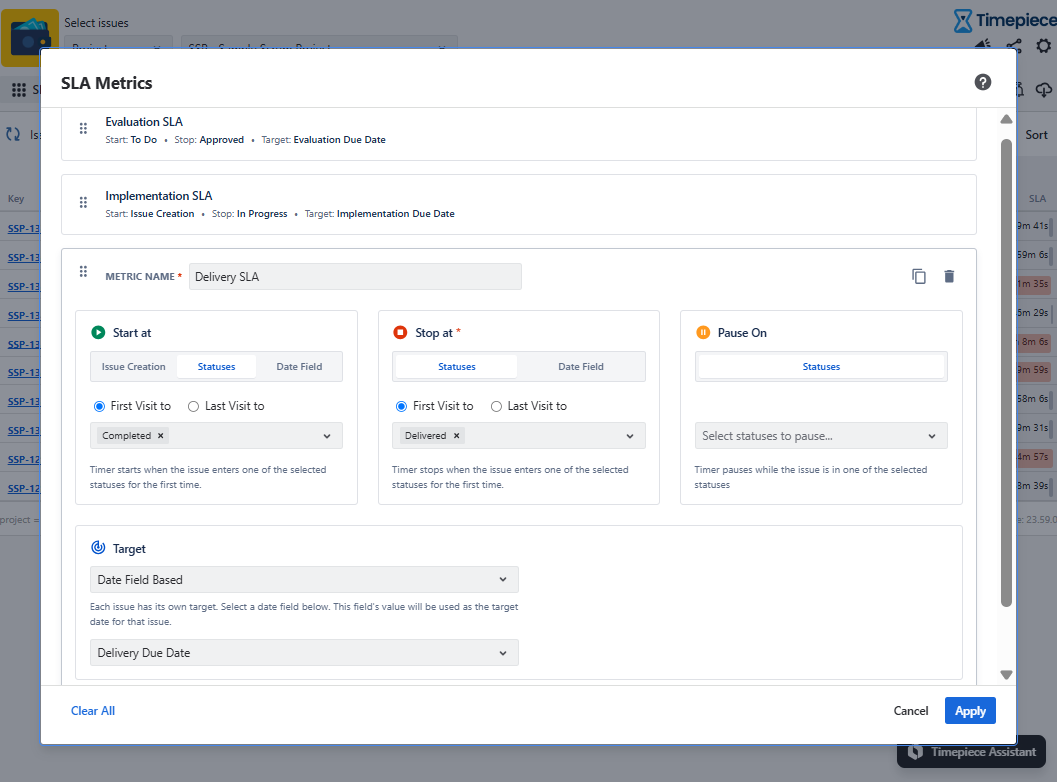
Each work item can have different values in these custom date fields, allowing Timepiece to evaluate each SLA against its own deadline.
Step 2: Set the Custom Date Fields
Before generating the report, make sure the relevant custom date fields are set for the work items included in the report.
-
Evaluation Due Date: Defines the deadline for the Evaluation SLA.
-
Implementation Due Date: Defines the deadline for the Implementation SLA.
-
Delivery Due Date: Defines the deadline for the Delivery SLA.
Each work item can have different values in these custom date fields, allowing Timepiece to evaluate each SLA against its own deadline.
Step 3: Generate the SLA Report
Generate the SLA Report to view the results for each stage.
The report shows whether the evaluation, implementation, and delivery stages were completed within their respective deadlines. This provides a single view of SLA performance throughout the customer request lifecycle.
This approach is useful when SLA deadlines are defined individually for each work item rather than using the same fixed duration for all work items.
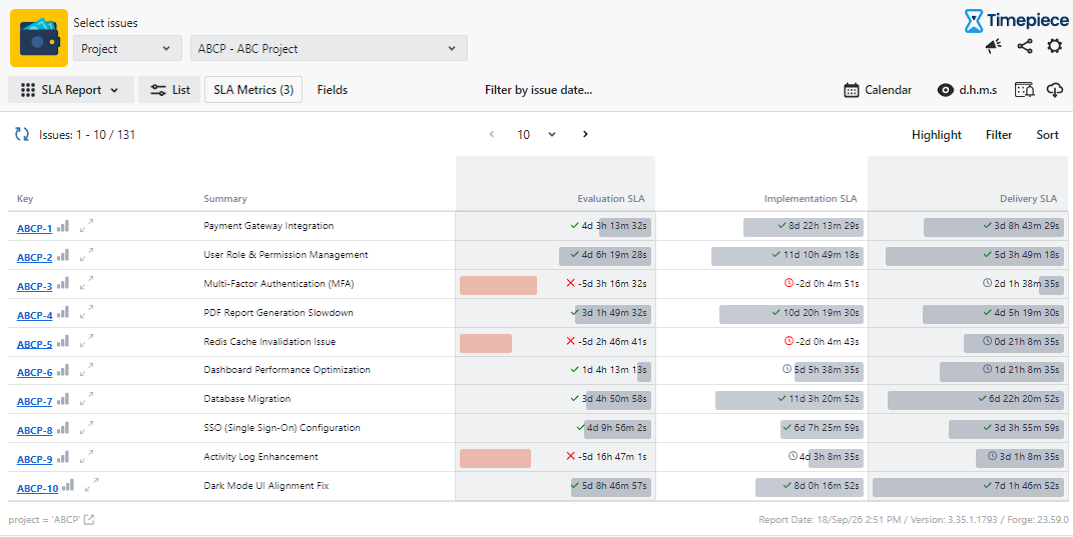
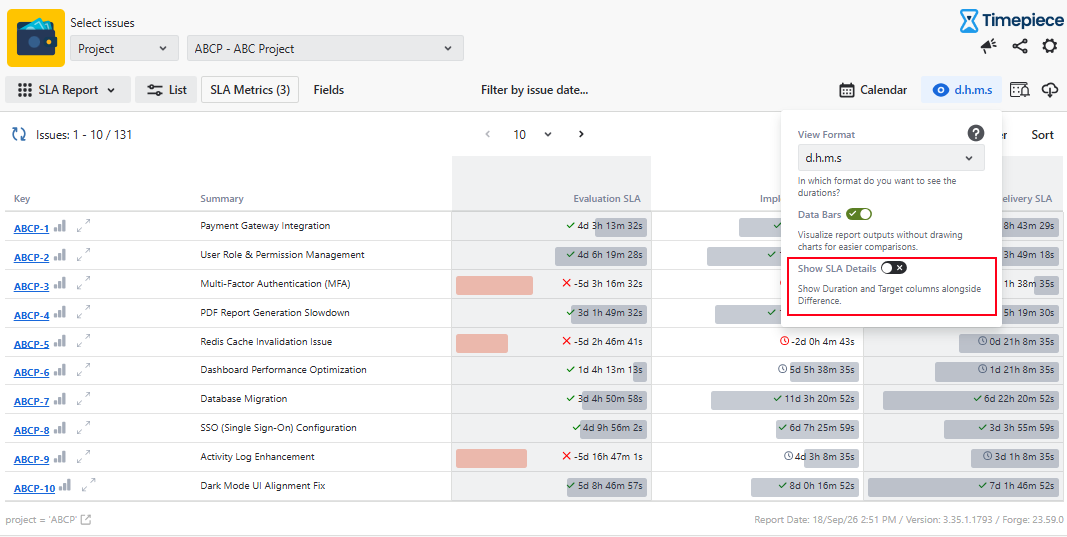
The View Format options can be used to display the Elapsed, Target, and SLA values separately for each metric.
For more information about configuring SLA Metrics and targets, see SLA Metrics.