
This article describes how to build an SLA report in Timepiece - Time in Status for Jira by defining SLA metrics and setting SLA targets. It covers three tasks: creating an SLA metric, defining a fixed duration-based SLA target, and generating the report to evaluate SLA performance across work items.
Business Need
You want to monitor whether work items meet defined service level targets based on the time spent in a process.
You need a way to define SLA metrics, set target values for those metrics, and view the resulting SLA performance across work items in a single report.
Challenges
SLA performance can be difficult to track when different work items have different start and stop points.
It can also be difficult to determine whether the time spent on a process is within the expected SLA target, especially for work items that are still in progress.
Reviewing SLA performance across multiple work items can require checking different metrics and their current statuses individually.
Solution
SLA Metrics in Timepiece allow you to define the duration to be measured and evaluate it against a specified SLA target. The SLA Report lists work items in rows and SLA metrics in columns, providing a consolidated view of SLA performance across multiple work items.
In this example, the SLA metric measures the time from work item creation until the work item reaches the Done status. A fixed duration-based target of 24 hours is defined to determine whether the SLA is met or breached.
Step 1: Define the SLA Metric
-
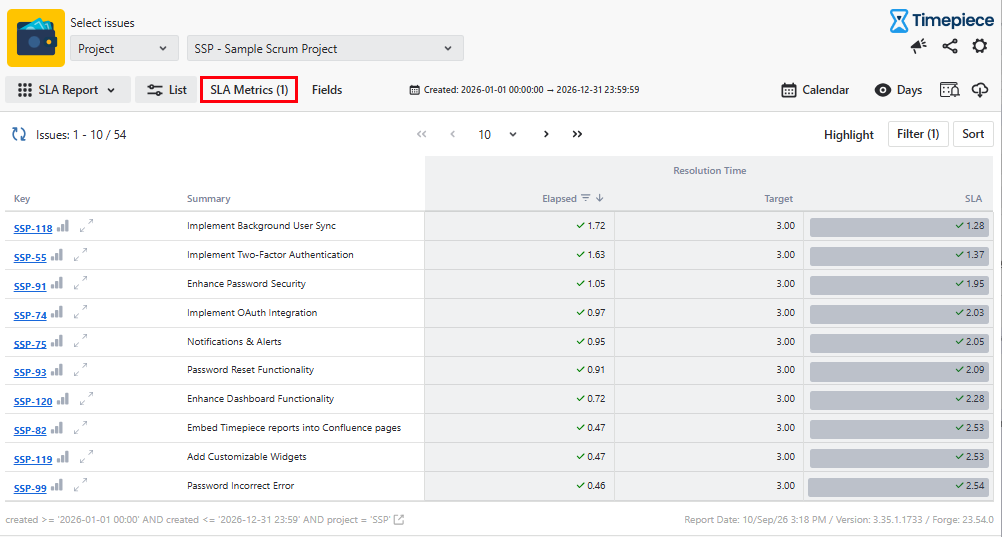
Go to the Timepiece reporting page and select the SLA Report.
-
Open the Metrics panel to define the metric.
-
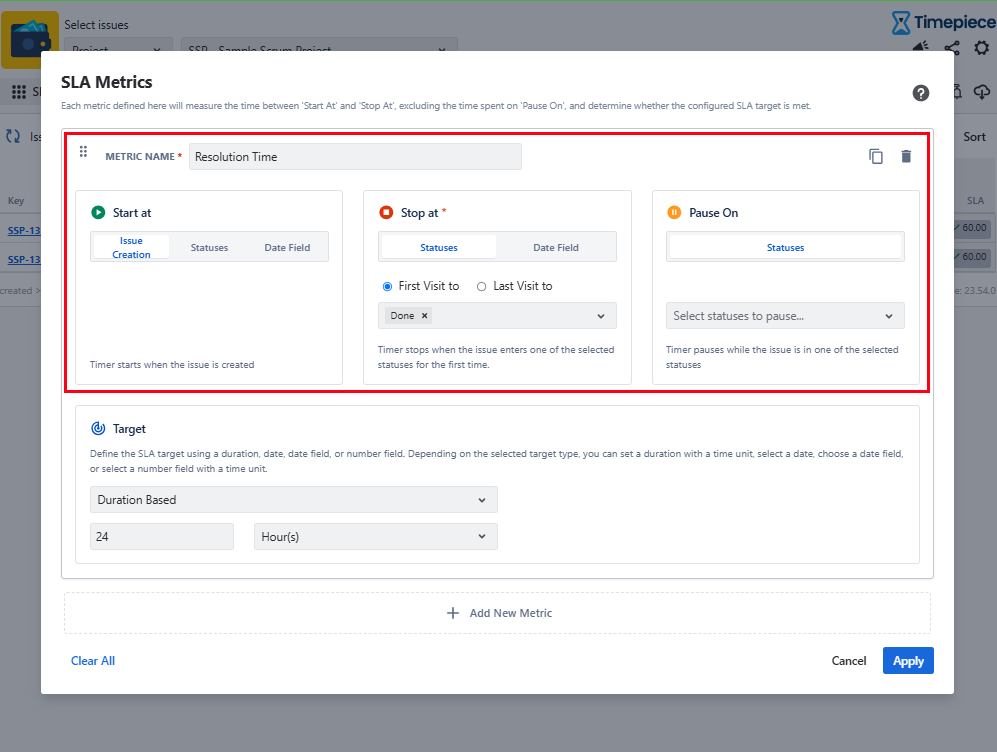
Enter a name for the metric, such as
Resolution Time. -
Set the Start At event to
Issue Creation. -
Set the Stop At event to
Donestatus. -
If certain statuses should be excluded from the calculation, select them in the Pause On field.
Step 2: Define the SLA Target
-
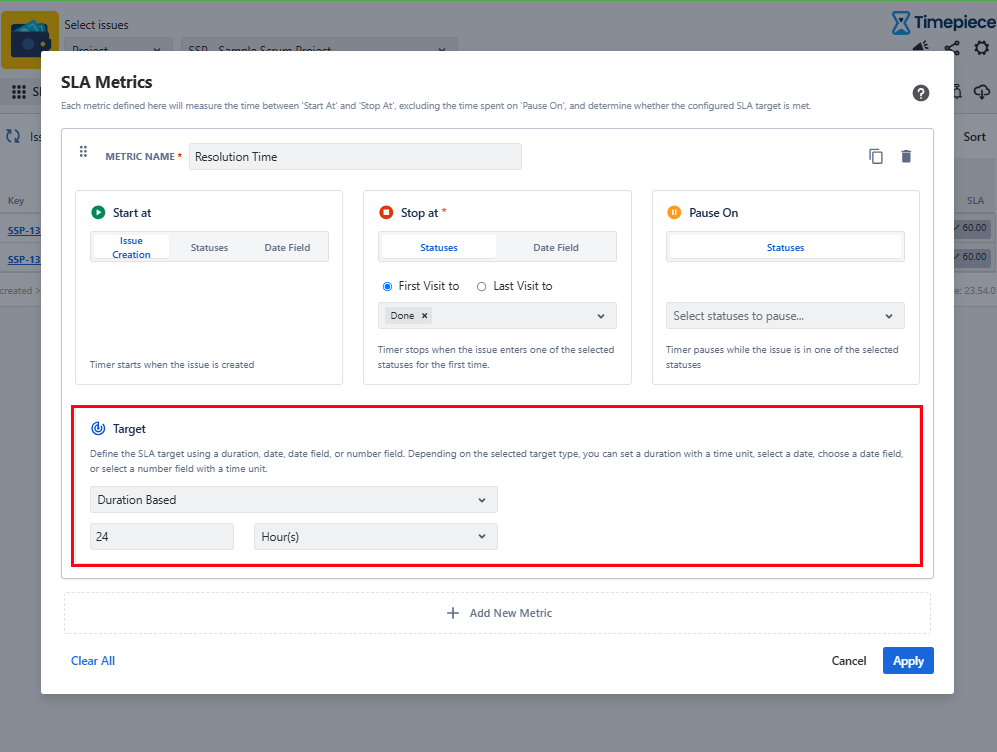
Select
Duration Basedas the target type. -
Enter
24as the target duration and selectHouras the time unit.-
The metric now has a fixed SLA target of 24 hours.
-
-
The calculated metric duration for each work item is compared with this target to determine the SLA result.
-
Run the report after completing the metric and target configuration.
Step 3: Generate the SLA Report
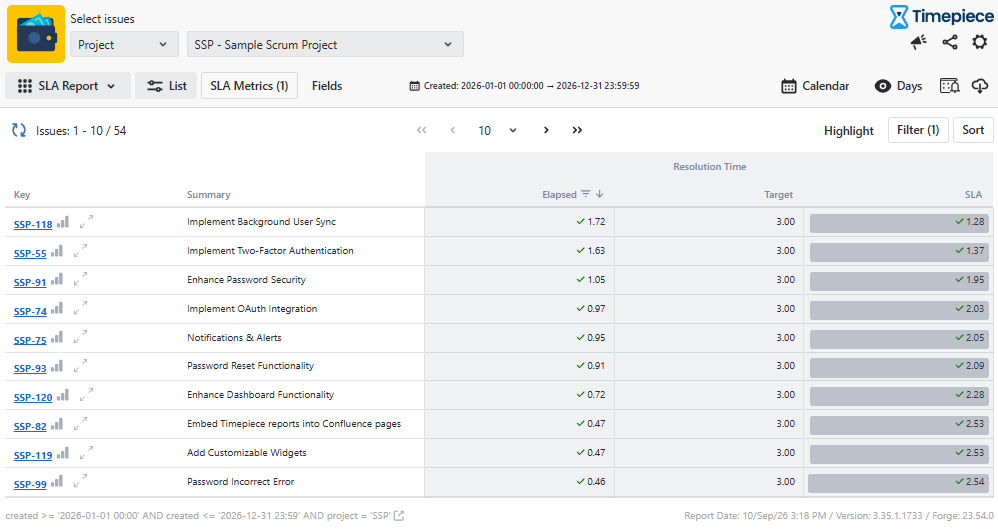
The report lists work items in rows and the defined SLA metric in columns. The SLA result shows whether each work item meets or breaches the defined 24-hour target.
You can define additional SLA metrics in the same report to monitor different process durations.
The resulting SLA report provides a single view for monitoring SLA performance across work items.
For more information about configuring SLA Metrics and targets, see SLA Metrics.