
This article explains how to create SLA metrics in Timepiece - Time in Status for Jira using custom date fields as the starting or ending point of an SLA calculation. This approach allows SLA measurements to be based on dates agreed or negotiated for individual work items instead of relying only on workflow events such as status transitions.
Business Need
SLA commitments may be agreed individually for different work items, resulting in different expected start or end dates. You may need to evaluate whether a work item was completed within its agreed timeframe. Using custom date fields as SLA boundaries and targets allows these dates to be included in the SLA evaluation.
Use Case
In this example, the SLA metric is based on three custom date fields defined for each work item:
-
Actual Start Datedetermines when the SLA measurement begins. -
Actual End Datedetermines when the SLA measurement ends. -
Due Datedefines the SLA target date.
This configuration allows the SLA performance of each work item to be evaluated using its actual start and end dates while considering its individually defined due date.
Step 1: Create the SLA Metric
-
Open the Timepiece reporting page and select the SLA Report.
-
Open the Metrics panel and add a new SLA metric.
-
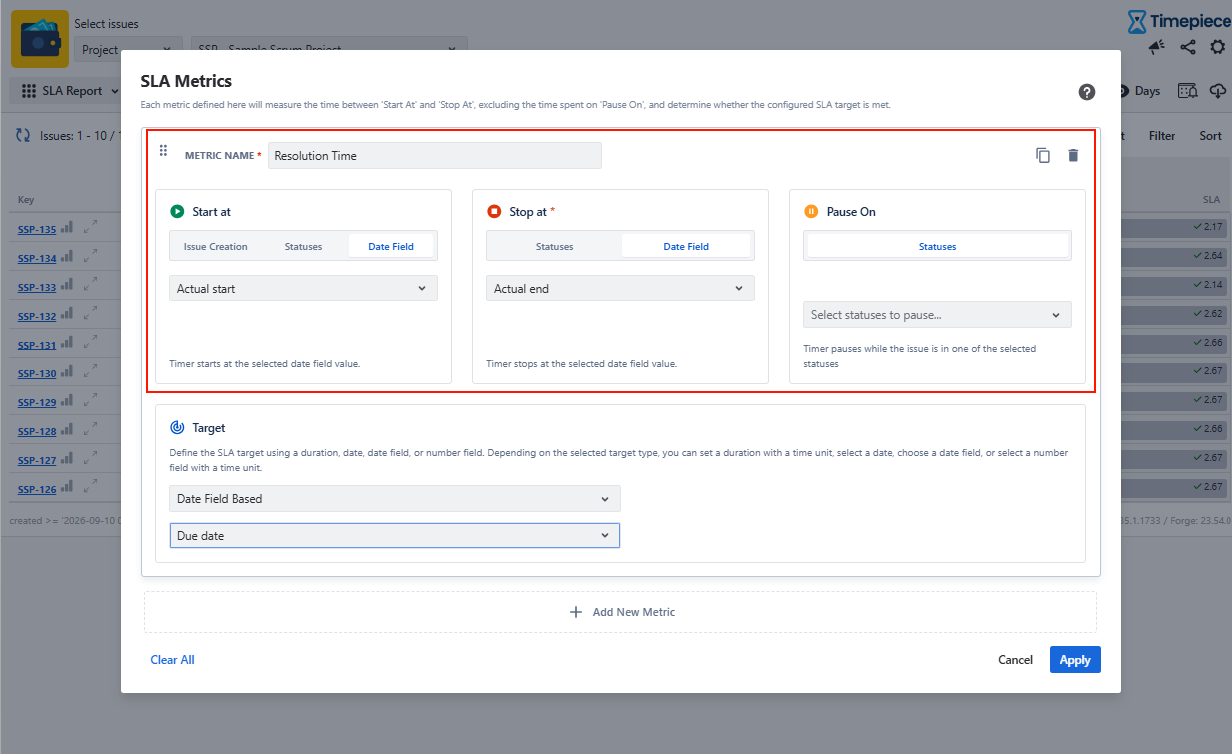
Enter a name for the metric, such as Resolution Time.
-
Set the Start At field to
Actual Start Date. -
Set the Stop At field to
Actual End Date.
-
If certain statuses should be excluded from the calculation, select them in the Pause On field.
The SLA metric measures the period between the configured start and end dates.
Step 2: Set the SLA Target
-
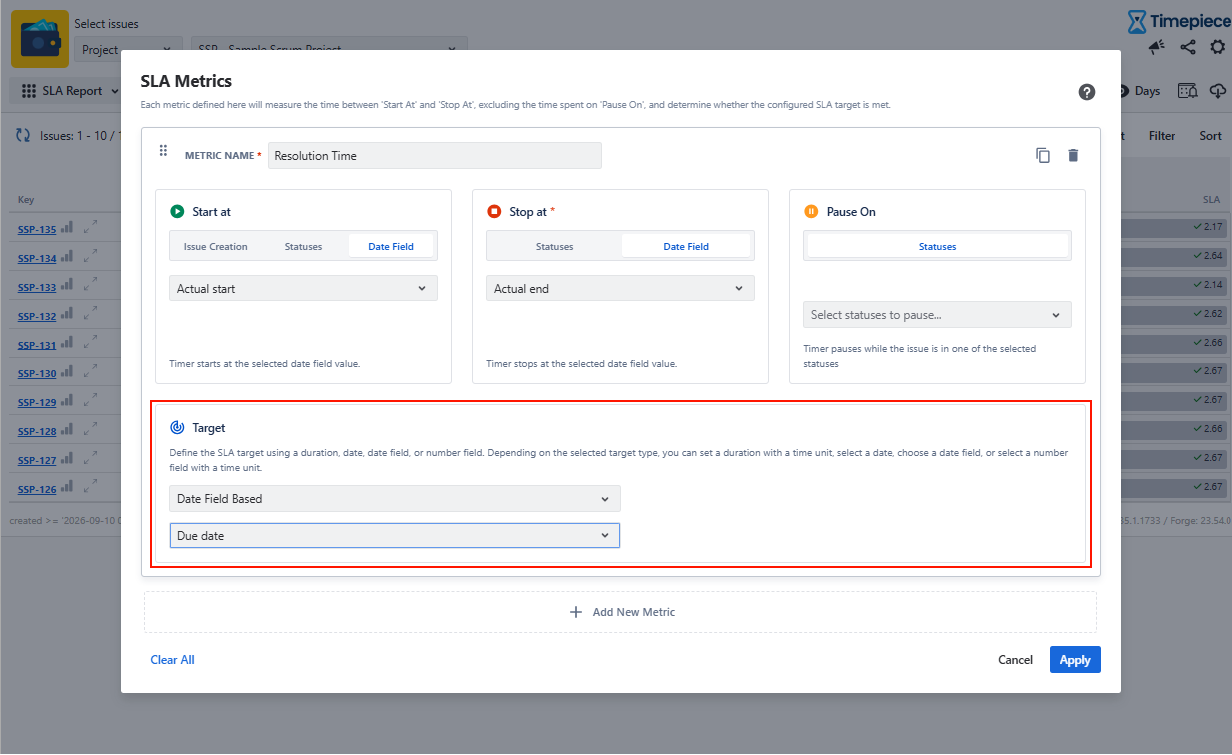
Select
Date Field Basedas the target type. -
Select
Due Dateas the target date field. -
Save the SLA metric configuration.
-
Run the SLA Report after saving the SLA metric configuration.
Step 3: Generate the SLA Report
The report evaluates each work item using its Actual Start Date, Actual End Date, and Due Date values.
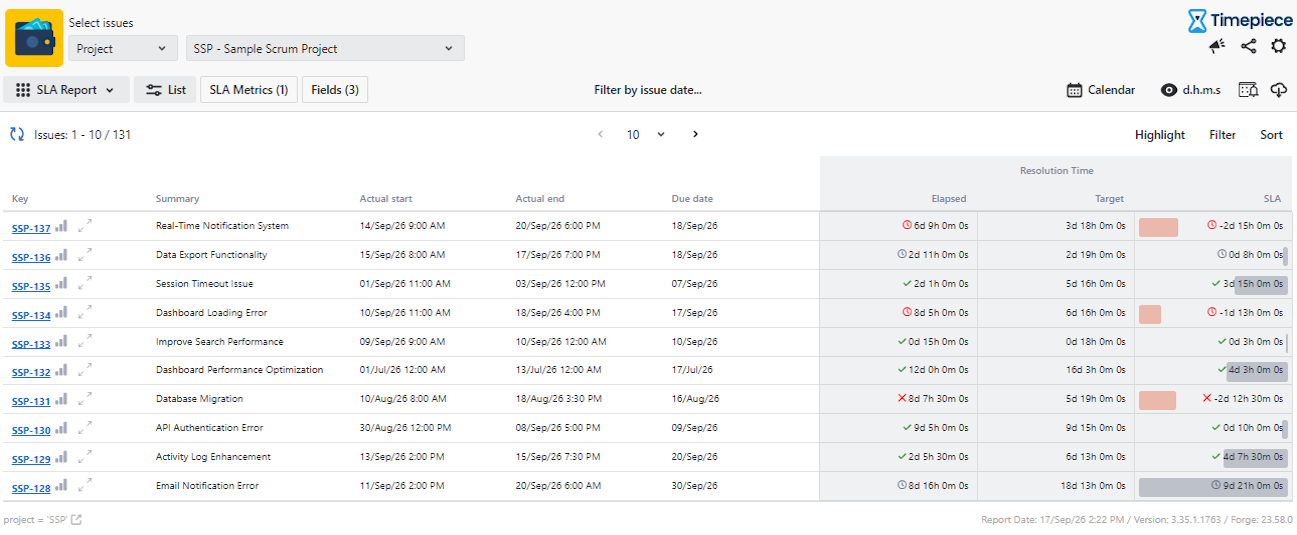
The SLA result shows whether the work item meets or breaches the defined target based on its individual dates.
You can add additional SLA metrics to the report when different SLA commitments need to be monitored.
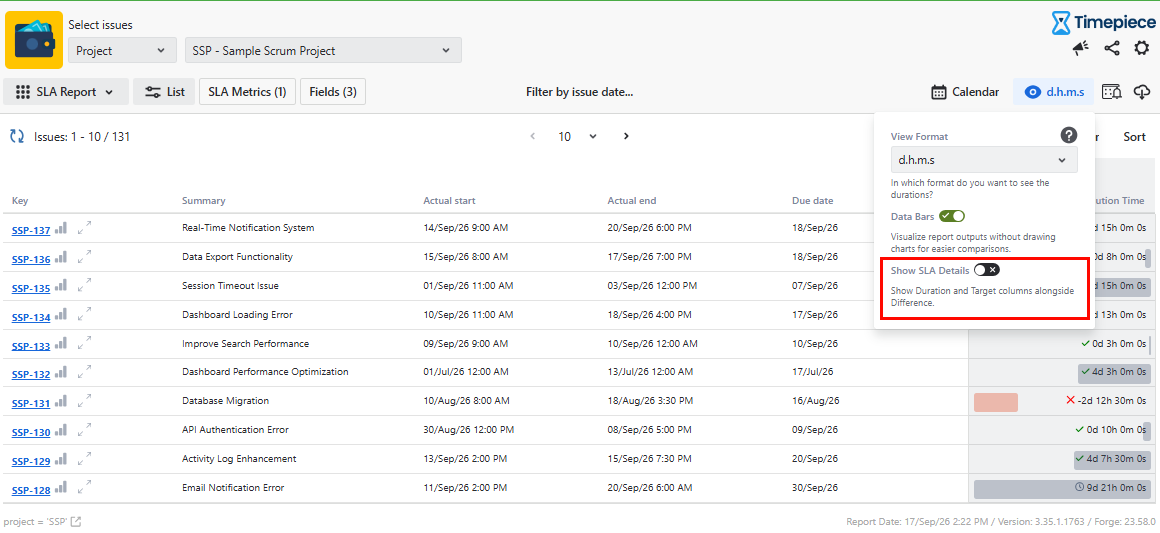
The View Format options can be used to display the Elapsed, Target, and SLA values separately for each metric.
For more information about configuring SLA Metrics and targets, see SLA Metrics.